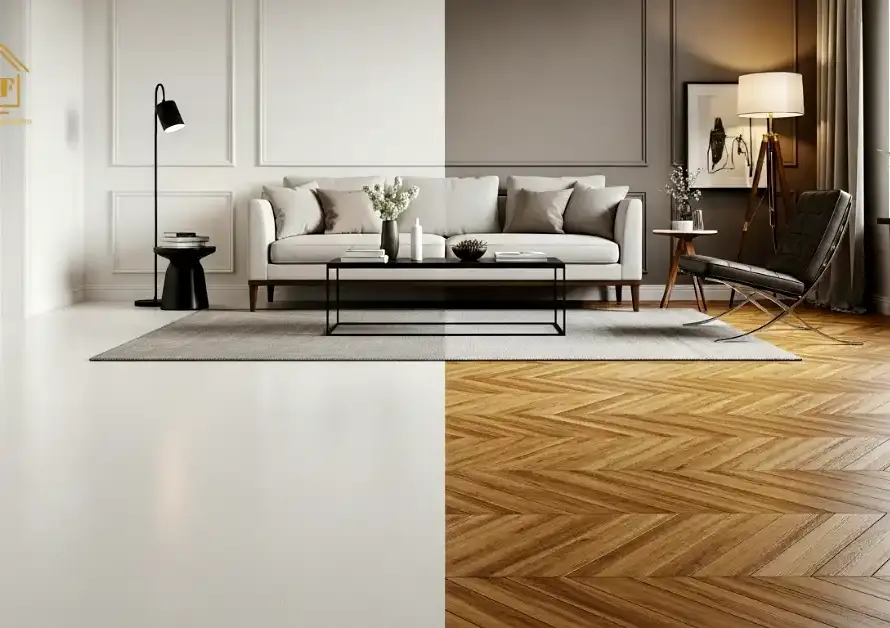
Nothing makes a home feel off like dull, scratched, or stained floors. Even in a tidy room, worn vinyl can make the space feel tired. Over time, spills, dirt, and foot traffic quietly rob your floors of their natural shine, leaving them looking old and lifeless.
Knowing how to deep clean vinyl floors properly can bring them back to life. With simple tools, practical steps, and a little care, you can remove grime, lift stubborn stains, and restore a smooth, gleaming surface. A clean, shiny floor doesn’t just look good, it makes the whole room look cleaner and more inviting.
How Deep Cleaning Differs from Regular Cleaning
You may already mop your floors regularly, but deep cleaning is a completely different level of care.
- Surface vs. Thorough: Regular cleaning removes dust, crumbs, and light dirt. Cleaning vinyl floors deeply tackles stubborn grime, sticky residues, and marks that hide in corners, edges, and textured patterns.
- Frequency: While regular cleaning is part of your weekly routine, deep cleaning is usually done once a month or a few times a year, depending on foot traffic.
- Tools and Techniques: Deep cleaning requires specialised cleaners, gentle scrubbing, and sometimes polishing. Simple mopping won’t remove all the hidden buildup. Using the right vinyl floor cleaning products makes the process easier and safer for the floor.
- Results: A deep clean restores your vinyl floors’ original shine, removes unsightly scuffs, and can even extend their lifespan, helping your home feel fresher and more welcoming.
Deep Cleaning Your Vinyl Floors: Step-by-Step Guide
To make this process easy and effective, we’ve broken it down into tools, preparation, cleaning, and polishing.
Essential Tools & Materials
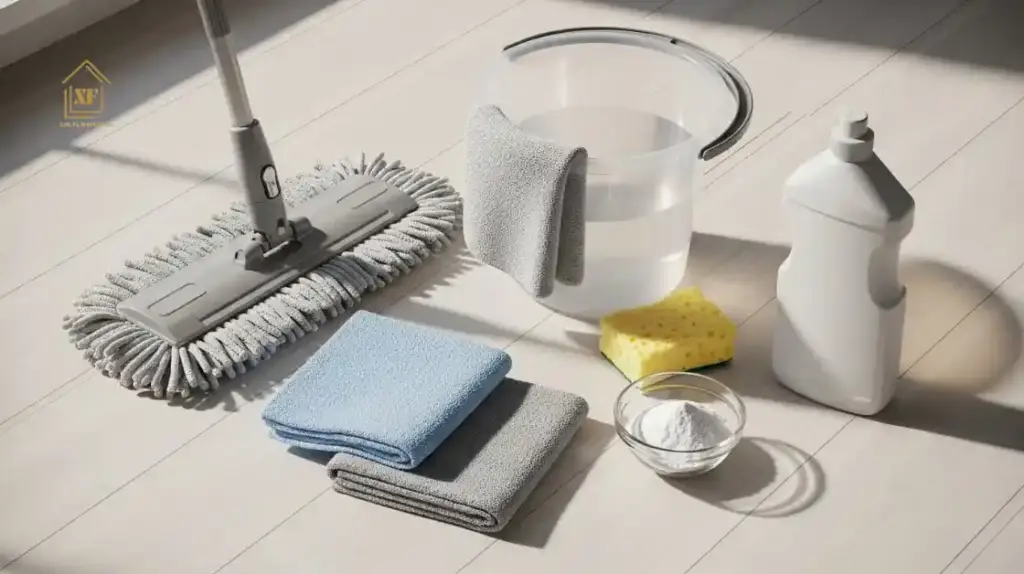
Before you start, gather everything you need. Having the right tools will save time and prevent mistakes:
- Mop and bucket
- Soft cloths or microfiber towels
- Vinyl-safe floor cleaner (pH-neutral is ideal)
- Baking soda for stains and scuffs
- Soft sponge or scrub brush (non-abrasive)
- Optional: vinyl floor polish or a natural polish like olive oil
Choose eco-friendly products wherever possible. They’re safer for kids, pets, and your indoor air quality.
Preparing Your Floors
A little preparation goes a long way:
- Clear the area: Move furniture, rugs, and decorations for full access.
- Sweep or vacuum: Remove dust, crumbs, and pet hair to avoid scratching the floor while mopping.
- Spot-test cleaners: Apply your cleaner in a hidden area to make sure it won’t damage or discolour the vinyl.
- Check for problem areas: Note stains, scuffs, or sticky spots that may need extra attention.
Deep Cleaning Process
Step 1: Basic Cleaning
Mix warm water with a gentle vinyl cleaner and mop the floor in small sections. Rinse the mop often to avoid spreading dirty water. Move slowly and deliberately to lift dirt rather than just push it around.
Step 2: Tackling Stains and Scuffs
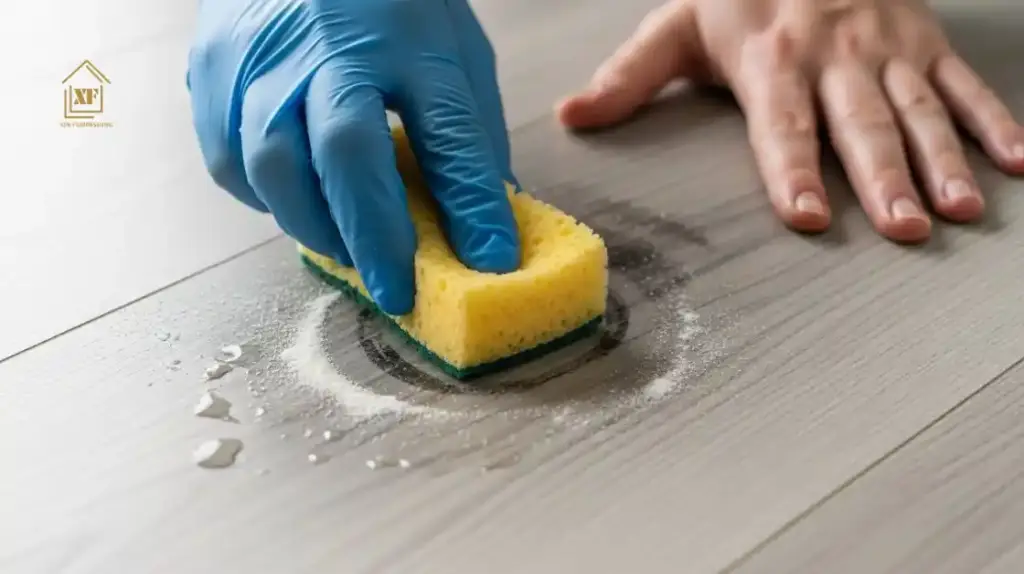
For stubborn marks:
- Make a paste with baking soda and water.
- Gently scrub with a soft sponge. Avoid harsh brushes or abrasive pads as they can scratch your floor.
- For really tough stains, let the paste sit for a few minutes before wiping it away.
You can also check out our complete guide to removing stains from vinyl flooring safely
Step 3: Rinsing and Drying
Once your floor is clean, rinse with fresh water to remove any residue from cleaners or baking soda. Dry with a soft cloth or microfiber towel to prevent streaks or water spots. Work in small sections to make sure each area is fully cleaned and dried before moving on.
Polishing and Restoring Shine
If you want that fresh-from-the-store finish:
- Natural polish (use sparingly): A very small amount of olive oil diluted in water can add temporary shine. Use this method only occasionally and buff thoroughly, as excess oil can attract dirt or leave residue on vinyl floors.
- Vinyl floor polish: For long-lasting results, follow the product instructions carefully. Apply thin, even coats and let them dry completely.
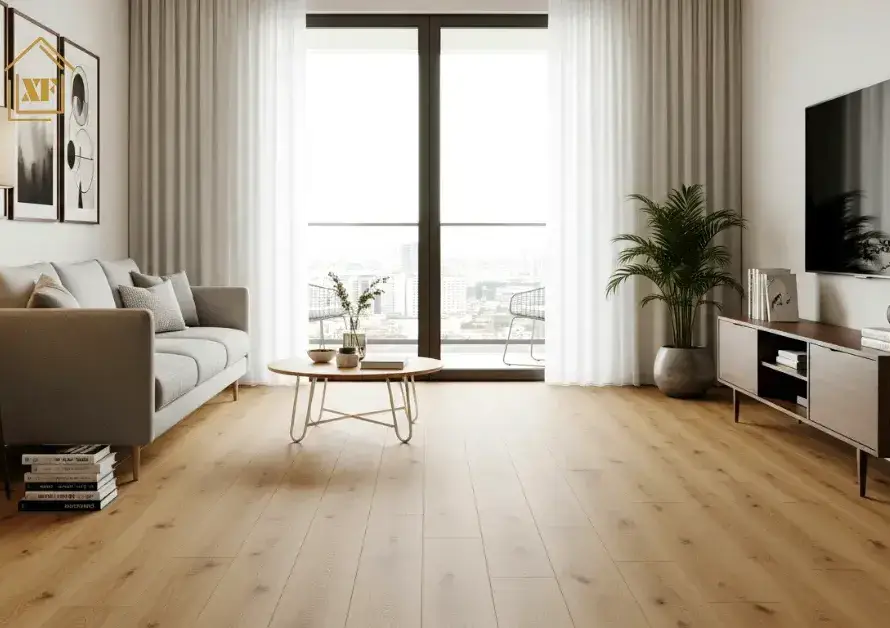
Walking barefoot across a floor that gleams instantly makes your home feel lighter and more put-together. The shine isn’t just cosmetic, it’s a sign of healthy, well-cared-for floors.
Common Mistakes to Avoid
- Using too much water, which can seep into seams and cause damage
- Scrubbing with harsh cleaners or abrasive tools that dull the surface
- Skipping the rinse step and leaving residue behind
- Over-polishing, which can lead to buildup and slippery floors
Avoiding these simple mistakes helps your vinyl floors stay clean, shiny, and well cared for.
Simple Maintenance Tips for Long-Lasting, Shiny Vinyl Floors
A deep clean is powerful, but everyday care and maintenance will keep your floors sparkling longer:
- Sweep or vacuum regularly: Prevents dust and grit from scratching the surface.
- Use mats and pads: Place mats at entrances and furniture pads under heavy pieces.
- Wipe spills immediately: Quick action prevents stains from settling into the vinyl.
- Avoid harsh chemicals: Bleach, ammonia, or abrasive cleaners can dull or damage vinyl over time.
- Rotate furniture occasionally: Helps prevent uneven wear or pressure marks.
Even small habits make a huge difference over time. A little care every day keeps your floors looking like new, whether it’s wood vinyl flooring, stone vinyl flooring, or vinyl tiles.
If you’re maintaining or upgrading your home with modern vinyl flooring Singapore homeowners trust, proper deep cleaning plays an important role in keeping floors beautiful and long-lasting.
Conclusion
Deep cleaning vinyl floors restores their shine, removes stains, and makes your home feel brighter and more welcoming. By using the right tools, preparing your floors properly, following a careful cleaning process, and maintaining them with simple daily habits, you can keep your floors seems new for years.
Regular deep cleaning, combined with ongoing care, not only improves the appearance of your vinyl but also extends its lifespan, making your home feel fresh, clean, and inviting every day.
FAQs
1. How do professionals clean vinyl floors?
Professionals usually start by sweeping or vacuuming to remove dust and debris. They then use a gentle, pH-neutral cleaner and mop the floor in sections. Stubborn stains are treated with soft scrubbing tools.
2. What is the best cleaning solution for vinyl floors?
The best solution is a pH-neutral, vinyl-safe cleaner mixed with warm water. For a natural option, a mixture of water and a small amount of vinegar or olive oil can help lift dirt and add shine.
3. Can vinyl flooring be wet mopped?
Yes, vinyl can be wet mopped, but it’s important not to use excessive water. Mop with a damp, well-wrung mop and avoid letting water sit on the surface for long periods.
4. What should you not use on vinyl?
Avoid abrasive scrubbers, steel wool, and harsh chemicals like bleach or ammonia. These can scratch, dull, or damage the surface over time.